Quantcast
Channel: dynamics ax – Goshoom.NET Dev Blog
Viewing all 117 articles
Browse latest View live

Find assembly for a given type – in AX 7

$
0
0

Five years ago, I wrote a blog post called Assembly containing a given type, demonstrating how to find the assembly where a given type is defined. I needed the same thing in AX 7, but instead of using the same code, I decided to utilize the fact that I can now easily write parts of my application in C#.

I added a C# class library project to the assembly with my X++ project and created a class with this method:

public static System.Reflection.Assembly findAssembly(string typeName)
{
    var assemblies = AppDomain.CurrentDomain.GetAssemblies();
    return assemblies.FirstOrDefault(a => a.GetType(typeName, false, true) != null);
}

I built the solution, went to my X++ project and added a project reference to the C# project. (Right-click References node, choose Add reference…, select the project on the Projects tab and confirm.)

This allowed me to call my C# method from X++, which I did:

var assembly = MyClassLibrary.MyClass::findAssembly('Dynamics.AX.Application.AsyncTaskResult');
if (assembly != null)
{
    info(assembly.FullName);
    info(assembly.Location);
}

I saved a few lines of code, but more importantly I showed you how easy it is to use C# projects together with X++ projects. It’s extremely powerful, because C# (and other .NET languages) give you quite a few options that you don’t have in X++ (although it’s not the case of this particular example).


Extensible control – X++ classes

$
0
0

User interface in AX 7 (Dynamics 365 for Operations) is now in web browser, which forced Microsoft to make many fundamental changes. Obviously, they had to rewrite all controls to HTML (plus JavaScript and CSS), but it has many additional consequences. For example, it’s not possible anymore to run X++ code on client; all X++ code runs on server. If something happens in browser, such as you click a button, the browser can still call X++ code on server, but the call over internet is quite slow. Another option is running client-side logic written in JavaScript. In either case, it’s quite different from how older versions of AX worked. On the other hand, it all gives us a plenty of new options.

AX developers usually don’t have to care about any HTML, JavaScript and so on; they deal with controls (such as buttons and grids), both in designer and in X++ code. The whole rendering to HTML, client scripting, communication with server and so on is done by controls themselves, with the help of AX kernel.

That you don’t usually have to care about how control work doesn’t mean that it isn’t useful. It can help you with debugging and exploring capabilities of existing controls, but most importantly it allows you to design new controls for your particular requirements. This is extremely powerful and it’s not too complicated either. Of course, you must know something about HTML and JavaScript, and you’ll find that designing a control that works great in all cases (small resolution, right-to-left languages etc.) isn’t completely trivial, but don’t bother about it right now.

Let’s build a simple control showing a map for given coordinates. I’m not going to dive into much details, explain all capabilities and so on; I want to show a case from beginning to end without any distractions. If you want to build a more useful control, you’ll still have to go to documentation and learn about additional features from there.

First of all, we need a so-called “build class”, which defines how the control behaves at design time in Visual Studio.

Create an X++ class called MyMapControlBuild and paste the following code there:

[FormDesignControlAttribute("My map")]
class MyMapControlBuild extends FormBuildControl
{
    real    latitude;
    real    longitude;
    int     zoom;
 
    [FormDesignPropertyAttribute("Latitude", "Map")]
    public real parmLatitude(real _latitude = latitude)
    {
        if (!prmIsDefault(_latitude))
        {
            latitude = _latitude;
        }
        return latitude;
    }
 
    [FormDesignPropertyAttribute("Longitude", "Map")]
    public real parmLongitude(real _longitude = longitude)
    {
        if (!prmIsDefault(_longitude))
        {
            longitude = _longitude;
        }
        return longitude;
    }
 
    [FormDesignPropertyAttribute("Zoom", "Map")]
    public int parmZoom(int _zoom = zoom)
    {
        if (!prmIsDefault(_zoom))
        {
            zoom = _zoom;
        }
        return zoom;
    }
}

The class inherits from FormBuildControl and has an attribute defining its human-friendly name. It also contains three fields (latitude, longitude and zoom) and corresponding parm* methods, each decorated with FormDesignPropertyAttribute. We’ll see these three properties in the form designer; we’ll be able to set their values and later we’ll use them to show something on the map.

The second argument of FormDesignPropertyAttribute is the category of properties, which seems to be ignored in the moment (but I still think you should use it; hopefully it will become supported later).

Then we need one more class, a so-called “runtime class”. It represents the X++ part of the actual control when rendered in user interface. You could put more logic there, but in this case, we’ll only expose our properties.

Let’s do it in a few steps. Create a new class, MyMapControl, with the following code.

[FormControlAttribute('MyMap', '', classstr(MyMapControlBuild))]
class MyMapControl extends FormTemplateControl
{
    public void new(FormBuildControl _build, FormRun _formRun)
    {
        super(_build, _formRun);
 
        this.setTemplateId('MyMap');
        this.setResourceBundleName('/resources/html/MyMap');
    }
}

Create three FormProperty variables.

FormProperty latitude;
FormProperty longitude;
FormProperty zoom;

For each property, add a parm* method decorated with FormPropertyAttribute. These properties will be available in JavaScript in browser.

[FormPropertyAttribute(FormPropertyKind::Value, "Latitude")]
public real parmLatitude(real _value = latitude.parmValue())
{
    if (!prmIsDefault(_value))
    {
        latitude.setValueOrBinding(_value);
    }
 
    return latitude.parmValue();
}
 
[FormPropertyAttribute(FormPropertyKind::Value, "Longitude")]
public real parmLongitude(real _value = longitude.parmValue())
{
    if (!prmIsDefault(_value))
    {
        longitude.setValueOrBinding(_value);
    }
 
    return longitude.parmValue();
}
 
[FormPropertyAttribute(FormPropertyKind::Value, "Zoom")]
public int parmZoom(int _value = zoom.parmValue())
{
    if (!prmIsDefault(_value))
    {
        zoom.setValueOrBinding(_value);
    }
 
    return zoom.parmValue();
}

We also need to initialize FormProperty objects and associate them with parm* methods. Put this code to the constructor, below super().

latitude = properties.addProperty(methodStr(MyMapControl, parmLatitude), Types::Real);
longitude = properties.addProperty(methodStr(MyMapControl, parmLongitude), Types::Real);
zoom = properties.addProperty(methodStr(MyMapControl, parmZoom), Types::Integer);

The last missing piece is the initialization of the control from the build class. We take values of designer properties and put them into our actual control.

public void applyBuild()
{
    super();
 
    MyMapControlBuild build = this.build();
 
    if (build)
    {
        this.parmLatitude(build.parmLatitude());
        this.parmLongitude(build.parmLongitude());
        this.parmZoom(build.parmZoom());
    }
 
}

Here is the complete class, so you can easily copy and paste the code.

[FormControlAttribute('MyMap', '', classstr(MyMapControlBuild))]
class MyMapControl extends FormTemplateControl
{
    FormProperty latitude;
    FormProperty longitude;
    FormProperty zoom;
 
    public void new(FormBuildControl _build, FormRun _formRun)
    {
        super(_build, _formRun);
 
        this.setTemplateId('MyMap');
        this.setResourceBundleName('/resources/html/MyMap');
 
        latitude = properties.addProperty(methodStr(MyMapControl, parmLatitude), Types::Real);
        longitude = properties.addProperty(methodStr(MyMapControl, parmLongitude), Types::Real);
        zoom = properties.addProperty(methodStr(MyMapControl, parmZoom), Types::Integer);
    }
 
    public void applyBuild()
    {
        super();
 
        MyMapControlBuild build = this.build();
 
        if (build)
        {
            this.parmLatitude(build.parmLatitude());
            this.parmLongitude(build.parmLongitude());
            this.parmZoom(build.parmZoom());
        }
    }
 
    [FormPropertyAttribute(FormPropertyKind::Value, "Latitude")]
    public real parmLatitude(real _value = latitude.parmValue())
    {
        if (!prmIsDefault(_value))
        {
            latitude.setValueOrBinding(_value);
        }
 
        return latitude.parmValue();
    }
 
    [FormPropertyAttribute(FormPropertyKind::Value, "Longitude")]
    public real parmLongitude(real _value = longitude.parmValue())
    {
        if (!prmIsDefault(_value))
        {
            longitude.setValueOrBinding(_value);
        }
 
        return longitude.parmValue();
    }
 
    [FormPropertyAttribute(FormPropertyKind::Value, "Zoom")]
    public int parmZoom(int _value = zoom.parmValue())
    {
        if (!prmIsDefault(_value))
        {
            zoom.setValueOrBinding(_value);
        }
 
        return zoom.parmValue();
    }
}

Build the solution, create a new form and add the new control, My map (the name comes from FormDesignControlAttribute).

Control selection

We can’t successfully run the form yet, because we still haven’t defined how the control should render, but we can work with the control in designer, set its properties, possibly override its methods and so on.

designer

If you open properties, you’ll see our three custom properties (Latitude, Longitude and Zoom), together with many other properties common to all controls (such as Visible). I would expect to see a new group of properties, Map, but it’s not how it works in the moment.

Fill in your favorite GPS coordinates, a zoom level and the required size of the control.

properties

This is all for now, we’ll add HTML and JavaScript in the next blog post.

Extensible control – HTML/JavaScript

$
0
0

The first part of this mini-tutorial showed how to create necessary classes for an extensible control. We have X++ classes for a control showing maps, we’ve added the control to a form and set a few properties. Now we have to add some HTML and JavaScript to do the job in browser.

Create a text file on disk, set its name to MyMap.htm and put this HTML code inside:

<div id="MyMap" data-dyn-bind="
    visible: $data.Visible,
    sizing: $dyn.layout.sizing($data)"></div>
 
<script src="https://www.google.com/jsapi"></script>
<script src="/resources/scripts/MyMap.js"></script>

It’s very simple. We have a single div representing our control, with appropriate ID. Then we use data-dyn-bind attribute to set some properties based on data from AX. It’s not strictly necessary for this example, but we would have to set some size anyway, so why not to use the right way?

At the bottom, we refer to some JavaScript files. The first one is the usual Google API, the other is a reference to a JavaScript file that we’ll add in a moment.

Create a new resource in your Visual Studio project, name it MyMapHTM and when asked for a file, use the file that you’ve just created.

We also need a resource for JavaScript. Create a file, MyMap.js, with this content:

(function () {
    'use strict';
    $dyn.controls.MyMap = function (data, element) {
        $dyn.ui.Control.apply(this, arguments);
        $dyn.ui.applyDefaults(this, data, $dyn.ui.defaults.MyMap);
    };
 
    $dyn.controls.MyMap.prototype = $dyn.ui.extendPrototype($dyn.ui.Control.prototype, {
        init: function (data, element) {
            var self = this;
 
            $dyn.ui.Control.prototype.init.apply(this, arguments);
 
            google.load("maps", 3, {
                callback: function () {
                    var map = new google.maps.Map(element, {
                            center: { lat: $dyn.value(data.Latitude), lng: $dyn.value(data.Longitude) },
                            zoom: $dyn.value(data.Zoom),
                            mapTypeId: google.maps.MapTypeId.HYBRID
                        });
                    }
            });
        }
    });
})();

If you have an API key, add it to the load() function in this way:

google.load("maps", 3, {
    other_params:"key=Abcdefg12345",
    callback: function () {

It all works for me without any API key, although it’s officially required. If needed, you can easily create a new API key. And you definitely should provide a key if you use this API in production.

I’m not going to explain the JavaScript code in detail. In short, it loads and calls the Google Maps API when our controls loads, it provides a callback function that sets properties of the map. It’s important to notice how we use values of our properties, such as $dyn.value(data.Latitude). These values come from the runtime class, MyMapControl.

As with HTML, create a resource, call it MyMapJS and add MyMap.js there.

Notice that you can edit resource files directly in Visual Studio.

editresource

And we’re done! Build the solution, run the form and you should see a map like this:

formwithmap

If you don’t see anything, make sure you’ve set Height and Width of the control, because my implementation doesn’t provide any minimal size.

If you have some other problem, you can use the debugger in Visual Studio (if it’s related to X++ classes), or press F12 in your browser to review DOM, debug JavaScript and so on.

Note that the control doesn’t merely show a picture; it’s a fully functional Google map – you can scroll, zoom the map or switch to StreetView, for example.

This control is deliberately very simple and doesn’t provide any additional logic, but you could easily utilize the JavaScript API to add pins or routes and do a plenty of other useful stuff. The control also doesn’t accept any input from users, so we didn’t need any binding to datasources nor any commands reacting to user actions, although all these things are possible. It’s always good to start with something simple and complicate things only when basics are clear enough.

Let me show just more one thing that the control already supports – setting properties from code.

Open the form in designer, find the map control (MyMapControl1) and set its AutoDeclaration property of to Yes. Then override form’s init() method and put the following code there:

public void init()
{
    super();
 
    MyMapControl1.parmLatitude(48.9745);
    MyMapControl1.parmLongitude(14.474);
    MyMapControl1.parmZoom(16);
}

When you run the form, you should see a map for coordinates provided in code and not those set in properties in designer. That was easy. :-)

As you see, creating custom controls isn’t that complicated. The X++ classes we wrote have a few dozen lines of code, but they’re actually very simple; they do little more than just defining our three properties. If needed for your controls, you can put any arbitrary logic there and you’ll be able to manage and debug it as any other X++ code. How difficult is building the front end depends on your proficiency in HTML and especially JavaScript. You obviously can’t build a web UI without any knowledge of web technologies, but on the other hand, you build just a control and not the whole application.

When design robust controls, you should take into account several things not needed for simple examples like this, such as localization and responsive design.

Follow documentation on the wiki (User interface development home page: Control extensibility) to learn more about development of extensible controls.

I think Microsoft made a smart move by designing this framework for extensible control and making it available to everybody. Although it was possible to create custom controls in older versions of AX as well (using ActiveX and managed controls), this is fully integrated (including design-time experience in Visual Studio) and it’s really easy to use. I don’t say it’s completely trivial, but it’s not anything obscure either. I’m looking forward to building more extensible controls myself.

AX7 development tools without VM

$
0
0

If you want to run and/or modify AX 7 (Dynamics 365 for Operations), you get a whole virtual environment configured by Microsoft and you either deploy it to Azure or run as a local virtual machine on Hyper-V.

I have a huge laptop with 32 GB RAM and two SSD disks built specifically for running AX 2012 and AX 7 VMs and I also have a few environments in Azure (my MSDN subscription gives me some credit for Azure every month), therefore I have all I need for development. But sometimes I don’t have access to these environments, such as when I travel just with a small laptop, and I would still like to review some X++, verify something when answering questions in forums and so on, and having AX development tools with me would be a great help.

I tried it and found that setting it up wasn’t very difficult, as I’m going to show below. Just let me make it clear – I’m talking about having access to Application Explorer, projects, designers and code, not about building and running Dynamics AX. It would be possible, but it would require more effort and my small laptop isn’t even powerful enough to do that. When I want to develop something, I use one of my proper development environment.

First of all, you need a machine with Windows and Visual Studio 2015. To show the process from the beginning on an empty box, I’ll use a virtual machine in Azure based on the image called Visual Studio Enterprise 2015 Update 3 with Universal Windows Tools and Azure SDK 2.9 on Windows 10 Enterprise N (x64).

Files and website

We won’t build the environment from scratch – we’ll copy the application from an existing development environment. Go to an environment you want to copy, find the folder containing packages and WebRoot (most likely J:\AosService), make a copy and put it to your machine. In my example, I’ve put it to c:\AX7.

Find web.config file inside WebRoot folder and update paths according to the new location. Edit > Find and Replace > Quick Replace (or just Ctrl+H) in Visual Studio will help you with it.

Then create a site referring to WebRoot. Because IIS isn’t enabled by default, go to Windows features and add it.

Open IIS manager and add a new website.

Set the name to AOSService, Physical path to the WebRoot folder (C:\AX7\AosService\WebRoot in my case) and Port to something that isn’t already used.

We’re not going to run the website; it’s here just for Visual Studio to locate configuration. If we wanted to actually run it, we would have to pay much more attention to the configuration of both the website and the application pool.

Visual Studio tools

When you have files and the service ready, it’s time to install the Visual Studio extension containing all tools for AX (Application Explorer, project types, the menu and so on). Download a binary update from LCS and extract it to a folder (D:\AllBinary71Update3Updates in my case). Then go to DevToolsService\Scripts, find Microsoft.Dynamics.Framework.Tools.Installer.vsix, double-click it to start the installation and walk through the installation wizard.

If you want to be able to create AX projects (which may be useful), you also have to copy MSBuild target files (which are references by project files) to the expected location. You can do it, for example, by executing the following Powershell script (with the Script folder as the current location).

$dir = New-Item "C:\Program Files (x86)\MSBuild\Microsoft\Dynamics\AX" -Type Directory
cp *.targets $dir

When you run Visual Studio (as administrator), you should be able to open Application Explorer, view code, create AX projects and so on.

But one important thing is missing. When you’re trying to locate an object or you’re familiarizing yourself with the application, you’ll likely use cross references, which we don’t have there in the moment. Let’s fix it.

Cross references

Cross references are stored in a SQL Server database called DYNAMICSXREFDB, therefore go to the source environment, create a full backup of this database and copy the file to your machine. If you have SQL Server installed, connect to it, if not, not an issue – Visual Studio comes with a local DB. You may want to download and install SQL Server Management Studio and then simply connect to a server called (localdb)\MSSQLLocalDB in the same way as if it was a regular SQL Server.

Restore DYNAMICSXREFDB from the file.

Give yourself sufficient permissions to the database, such as making yourself a database owner.

You have to tell Visual Studio where it’ll find the database, therefore open {Documents}\Visual Studio 2015\Settings\DefaultConfig.xml and change the value of CrossReferencesDatabaseName to (localdb)\MSSQLLocalDB (or your database server if you don’t use local DB). Start Visual Studio again and you can start using references as usual.

Although it doesn’t build a full environment with all features, it fulfills its purpose. Now I can easily carry all AX 7 code with me, exploring it on plane, quickly checking code or property names when somebody asks in a forum and so on. My intention isn’t to stop using VMs from Microsoft for development and testing – on machines powerful enough to run AX (don’t forget that the compiler is designed for 16 GB RAM, for example), I can use the VM as well, so configuring the whole environment on my own installation of Windows would be worth the effort. I did this when I couldn’t use the VM and the time spent with setting it up it is already paying off. Documenting it for others took much more time than that. 🙂

JSON-based custom service with parameters (AX 7)

$
0
0

Dynamics 365 for Operations deploys custom web services in two ways: as SOAP-based services and JSON-based services. AX developers are often familiar with SOAP services (which were used in AX 2012), but JSON-based ones are new to them.

One particular challenge is passing arguments to a service. Let’s say we have an Add operation, which can sum two numbers.

public int Add(int a, int b)
{
    return a + b;
}

To call the service, we have to provide values for both arguments, a and b. Because the expected format is JSON (Java Script Object Notation), we have to provide a JSON string describing an object with two properties (a and b) and their values. This is it:

{ a: 2, b: 5 }

Note that names of the properties are important – they must match parameter names in the X++ method.

Because building JSON strings by yourself can be cumbersome (especially with more complex parameters), a better approach is working with objects and leaving conversion to JSON to a serializer.

For example, you can build a simple class,

public class AddContract
{
    public int a { get; set; }
    public int b { get; set; }
}

create an instance with required values and call JsonConvert (from Newtonsoft.Json) to convert it to string:

AddContract contract = new AddContract { a = 2, b = 5 };
string json = JsonConvert.SerializeObject(contract)

If you need AddContract class just at this single place, maybe it’s not worth creating it at all. We can use an anonymous object instead and it will still work the same.

var contract = new { a = 2, b = 5 }; // Anonymous object
string json = JsonConvert.SerializeObject(contract)

When we have the JSON string, we have to send it to the service. The implementation below assumes that you use AuthenticationUtility from the sample solution from Microsoft.

// Prepare HTTP client, including authentication
HttpClient client = new HttpClient();
client.BaseAddress = new Uri(ClientConfiguration.Default.UriString);
client.DefaultRequestHeaders.Add(OAuthHelper.OAuthHeader, OAuthHelper.GetAuthenticationHeader());
 
// Define parameters
var contract = new { a = 2, b = 5 };
 
// Create a request
HttpRequestMessage request = new HttpRequestMessage(HttpMethod.Post,
                                                    "api/services/MyServiceGroup/MyService/Add");
request.Content = new StringContent(JsonConvert.SerializeObject(contract),
                                    Encoding.UTF8,
                                    "application/json");
 
// Run the service
var result = client.SendAsync(request).Result;
 
// Display result to console
if (result.IsSuccessStatusCode)
{
    Console.WriteLine(result.Content.ReadAsStringAsync().Result);
}
else
{
    Console.WriteLine(result.StatusCode);
}

If you’re using WebRequest instead of HttpClient (as in Microsoft sample code), you can use add parameters to the request in this way:

var contract = new { a = 2, b = 5 };
string json = JsonConvert.SerializeObject(contract);
 
Byte[] byteArray = Encoding.UTF8.GetBytes(json);
 
request.ContentLength = byteArray.Length;
request.ContentType = "application/json";
 
using (Stream dataStream = request.GetRequestStream())
{
    dataStream.Write(byteArray, 0, byteArray.Length);
}

It’s clearly nothing difficult, just make sure that your properties in JSON exactly match parameter names. For example, if parameters of my Add operation were prefixed with underscore (as usual in X++), the JSON string would have to be { _a: 2, _b: 5 }.

It’s official – AX 7 will support deployment on-premises

$
0
0

Make sure you familiarize yourself with new (upcoming) deployment options for Dynamics 365 for Operations. In short, you’ll be able to run it outside cloud (e.g. on your own hardware) and then either synchronize data to cloud or keep them locally. Of course, not having data in cloud means missing some cloud features such as Power BI. There will be also a change in licensing, because the usual subscription licenses include Azure resources, which you won’t need if you keep everything locally.

This is a huge news for quite a few customers who couldn’t go to cloud because of the distance from nearest Azure data centers, local law or company policies.

New X++ features in AX 7

$
0
0

X++ didn’t change much since I started to work with it eleven years ago, with a few exceptions such as event handlers in AX 2012.

That’s not true anymore in AX 7, because it comes with many new language constructs (and more are expected). If you’re familiar with modern object-oriented languages, and especially C#, you’ll find them very familiar, but some concepts will be completely new for many AX developers.

In general, X++ now utilizes many features supported by CIL and the syntax of new features closely follow C#, which is helpful for everyone who knows or is going to learn C#. To use the language correctly, you also have to be aware of some details of the runtime environment (CLR), such as how it handles garbage collection. You’ll find much more information written for C# developers than for X++ developers, therefore consider learning about common features from sources originally intended for C#.

Some new features help with implementation hiding and splitting the application to logical packages, which is really missing in AX these days (and AX7 isn’t the solution either, it’s just one more step in the right direction).

I’m not going to talk about every new feature, because you can already find that in AX7 wiki (Using X++ and debugger features) and mfp’s blog: (What is new in X++ in AX7?). Let me just mention a few things that I consider especially important or tricky.

Private member variables

This feature may not look very exciting, but is solves an important problem. Having all member variables protected (as in previous AX versions) means that any child class can access and change any variable defined in its parents. Classes often have member variables that they need for their own internal logic and that shouldn’t be exposed to anybody else.

Making variables private protects them from unexpected changes and it also make it easier for developers extending the class. For example, if a parent class has eight private fields and two protected, developers adding child classes have to about just two variables and not all ten. It’s obvious that the private ones aren’t intended for them.

Const and readonly

Const represents values that never change. It’s a simple concept, but it’s nice to have it in X++, instead of using variables (which doesn’t prevent changes) and macros (which don’t have type and are really ugly).

Readonly member variables are more interesting, because you can set their value when creating an object and they can’t change afterwards. It’s a common scenario but there was no way to enforce it in previous versions. It also allows you to create immutable objects.

Static member variables

Static fields (member variables) share certain values across all instances of a class. It’s useful in some cases, but it’s also very dangerous for several reasons. Please try to avoid them, especially if you don’t understand what these two points mean:

  • Static fields are often responsible for problems with memory allocation, when a static field refers to an object tree with a lot of data and the reference makes all these objects ineligible for garbage collection. If you have to make such a reference, weak references may help you in same cases.
  • If the field is used in more than a single thread, its value may change at any point (unless you introduce some type of locking). If you set a value to a static field a second ago, you still can’t be sure that some other thread didn’t already change it to something else. This may lead to bugs that are very difficult to reproduce. Multi-threading issues aren’t limited to static fields, but they’re common with them, because the same value is automatically shared by all threads.

Finally

Finally block can be used after try in a similar way as catch. Code inside finally executes regardless of whether code in try finished normally or it threw an exception. It’s usually used to clean up resources allocated in try block.

Note that it’s completely valid to use try/finally without any catch clause (because you have exception handling at some higher level or you simply can’t handle it in any way).

try
{
    throw error("It's broken!");
}
finally
{
    info("Let's clean up everything");
}

Using

This statement is in fact a shortcut for try/finally statement used for classes implementing IDisposable interface. It’s intended for releasing certain resources that CLR can’t manage automatically and that should be released as soon as possible (such as file handles). You want to be sure that regardless of happens (e.g. exception is thrown), you won’t leave a resource locked, memory allocated and so on. If the resource is wrapped in a class correctly implementing IDisposable and you instantiate the class with using, you’re safe.

You will meet the dispose pattern very often if you start using .NET types for streams, database queries and network communication, among others. Make sure that you correctly dispose all disposable objects, otherwise you can run out of database connections, for example. The using statement is here to make it easier for you.

Maybe you never needed anything like that before, but I think we’ll mix X++ and other .NET code much more often in AX 7, because it’s now so much easier, and therefore more developers will need this kind of knowledge.

Note that you technically can utilize using blocks for other purposes – all you need to implement IDisposable. The following example shows a custom class TimeMeasure used to measure how long does it take to execute code inside the using statement.

using (TimeMeasure m = new TimeMeasure())
{
    // Do something here
}

This is the implementation, which coincidentally shows several other new features in AX 7:

using System.Diagnostics;
 
class TimeMeasure implements System.IDisposable
{
    private Stopwatch stopwatch = Stopwatch::StartNew();
 
    public void Dispose()
    {
        stopwatch.Stop();
        info(stopwatch.Elapsed.ToString());
    }
}

The using block starts with creating an instance of the class, which initializes the member variable. And when the block ends, Dispose method is executed.

Please take it as a demonstration of how the statement works, not as an encouragement to misuse IDisposable on regular bases. This technique is useful in some cases, but they aren’t very common.

Notice that my code above uses using in another context: using System.Diagnostics. That’s a completely unrelated thing, they merely use the same keyword.

Extension methods

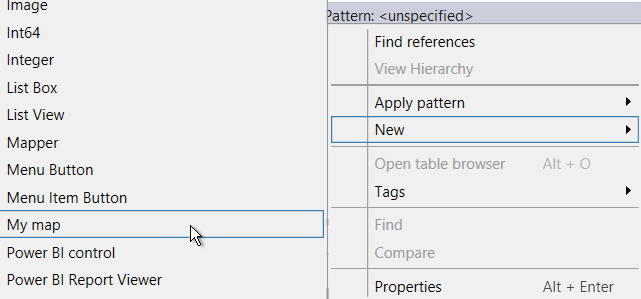
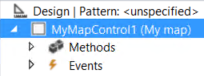
Extensions methods provide a way to pretend that you added an instance method to a class, table, view or map without actually changing it.

For example, let’s say that I want a method to convert a list to a set. I can’t change the List class (because it’s defined in AX kernel), but I can easily write a static method doing the conversion for me.

Set set = List_Extension::toSet(list);

It works, but it’s not easy to read and you have to know about the existence of List_Extension class. I would prefer to do this instead:

Set set = list.toSet();

And this is exactly what extension methods make possible.

To be considered an extension method, the method (and the class in which it’s defined) must meet certain criteria, which you can find on AX7 wiki. I’ll rather show you the actual implementation of toSet():

public static class List_Extension
{
    public static Set toSet(List _list)
    {
        //TODO: throw error if _list is null
 
        Set set = new Set(_list.typeId());
        ListEnumerator enumerator = _list.getEnumerator();
        while (enumerator.moveNext())
        {
            set.add(enumerator.current());
        }
 
        return set;
    }
}

Notice that it’s really just a static method that gets a list as its argument. It can’t access any non-public members as it could if it was an actual instance method added to the class.

Even if you have a class that you technically can change (unlike List in the example above), you still may want to use an extension method to avoid overlayering.

You don’t necessary have to create any extension method by yourself, but you must be at least aware of their existence. Otherwise you would wonder where certain methods come from.


These are really great additions to X++, aren’t they? And don’t forget that this is not an exhaustive list.

IoC containers for extensibility

$
0
0

Dynamics 365 for Operations (AX 7) tries to get rid of the ugly concept of “customizations”, when developers directly change somebody else’s code, which has a plenty of negative consequences. Most importantly, installing a new version isn’t easy, because it requires dealing with conflicts in code.

There are several ways how to make a class extensible without requiring changes in the class itself. In certain cases, you can make a specialization of a base class, add additional behavior or modify the current behavior by overriding methods. It’s easy to do and understand, but there is a catch: you have to control the place where the class is instantiated, to provide your class instead of the original one. For example, if you have code like this,

IComponent c = new ComponentBase();

it will always create an instance of ComponentBase and nothing else. You need something smarter.

The solution is dependency injection – things like the construction of specific types are taken out from the class using them. The logic is only aware of an interface or base class and doesn’t care about what exact type it is, therefore you can start using another type and it will all work.

For example, you can provide the dependency in a constructor:

class MainLogic
{
    IComponent component;
 
    public void new(IComponent _c)
    {
        component = _c;
    }
}

The class doesn’t refer to ComponentBase or any other specific type; it will work with any class implementing IComponent interface and it’s up to the calling code to provide a suitable type.

If you don’t do anything else, you might end up with the same problem as before. There may be a piece of code constructing ComponentBase directly and passing it to the constructor, which you would have to replace by changing the code:

new MainLogic(new BaseClass());

You need to stop constructing such instances by yourself – leave it to a special piece of logic that knows which types to use: an Inversion of Control (IoC) container.

In Dynamics 365 for Operations, you can do something similar with plugins, but it’s quite cumbersome. Let me demonstrate how easy it can be to use an IoC container, namely Autofac in C#. I think it should be inspiration for X++.

First of all, let’s make a base class with some default implementation:

public class ComponentBase
{
    public virtual int GetValue()
    {
        return 42;
    }
}

and another class (overriding the method) that we want to use instead of the base class.

class ComponentCustom : ComponentBase
{
    public override int GetValue()
    {
        return 1337;
    }
}

Using an interface would be better, but because most code in X++ doesn’t utilize interfaces, this is closer to reality.

Then let’s have a class calling a method of the component and using the value (in this case simply showing it in console).

class MainLogic
{
    public ComponentBase Component { get; set; }
 
    internal void DoStuff()
    {
        Console.WriteLine($"The value is {Component.GetValue()}");
    }
}

In this case, I’m not getting the component in constructor – I’m using a property instead, which the calling code (such as an IoC container) will have to set.

Before actually calling the logic, we have to set up our IoC container. Here is the code for Autofac:

var builder = new ContainerBuilder();
builder.RegisterType<ComponentCustom>().As<ComponentBase>();
builder.RegisterType<MainLogic>().PropertiesAutowired();
IContainer container = builder.Build();

The most interesting is the second line, where we instruct the container to use ComponentCustom in place of ComponentBase.

Then we can use container’s Resolve method to get an instance of MainLogic and execute DoStuff():

MainLogic mainLogic = container.Resolve<MainLogic>();
mainLogic.DoStuff();

The result is, as expected, is the value from ComponentCustom .


IoC containers allow you to get rid of instantiating components by yourself, therefore there is nothing like new ComponentBase() that you would have to change by overlayering; you just need a way to call RegisterType() of the builder. AX could offer an event for this purpose, where each extension would register its logic. Or there could be attributes similar to those used for declarative event handler subscriptions. IoC containers even allow setting type mapping in configuration files, therefore you can easily change type to use without touching code at all.

It would still require changes to the application, but it would usually mean merely replacing a constructor call with Resolve(). The current alternative, plugins, requires much more work and therefore it’s unlikely to be widely adopted for this purpose (to be fair, it’s not intended for this).

Because X++ doesn’t support properties, the implementation of my example would be more involved in current X++, but that’s just an implementation detail. And it may be extra motivation for introducing properties to X++.

Although I focused on extensiblity in this blog post, the loose coupling you can achieve with dependency injection has many other benefits, such as simplifying isolation for unit testing.

Note that IoC containers can do much more than what I’ve demonstrated here and there are many different solutions to choose from.

Just for the sake of completeness, X++ plugins are based on Managed Extensibility Framework.


Flow and Logic Apps

$
0
0

I see a lot of confusion regarding Microsoft Flow and Logic Apps, so let me very briefly explain what they are and when you should use them.

First of all, you should realize that they’re very closely related. For example, this is the designer for Flow:

And this is the designer for Logic Apps:

They’re almost identical, because Microsoft Flow is built on top of Logic Apps. Many capabilities are not just similar; they’re physically the same.

Both Logic Apps and Flow are cloud-based integration services. They allow access to data from various system (my example above uses Azure Service Bus and Dynamics 365 for Operations), to run various actions, define workflows with conditions, branches, loops and things like that. They use the same connectors, the same actions and the same graphical designer.

So what’s the difference?

Microsoft Flow is intended for self-service integration. It empowers end users to set up various integration by themselves, without having to request developers to do it for them. For example, I may want to get some data (such as expected receipts) by e-mail every morning. It would help me, but asking my implementation partner to do it for me would be an overkill. I can use Microsoft Flow to set it by myself.

Azure Logic Apps, on the other hand, is a development platform which can be used for company-wide and mission-critical integration scenarios. Although connectors and things like that are the same as in Flow, Logic Apps offers Code view in addition to the graphical designer, which may be more efficient in some cases and more importantly, it offers some additional advanced capabilities. Logic Apps can also be developed in Visual Studio, stored in version control as any other code, built and deployed by VSTS, they offer more features around security, monitoring, automation and so on.

It seems that people hear more about Flow than Logic Apps and some of them try to use Flow for all their integration needs, but it isn’t a good idea. Flow isn’t intended for this purpose and you would soon miss many tools needed for development, deployment and maintenance of your solution. Flow is really a simplified version for personal needs.

By the way, people often ask about how to integrate with on-premises systems. Both Logic Apps and Flows offer gateways (link for Logic Apps, link for Flow) that you can use to access on-premises files, databases, SharePoint and thing like that.

Catching exceptions in AX 7

$
0
0

In this blog post, I briefly recapitulate how to throw and catch exceptions in X++ and introduce a new way of handling CLR exceptions in AX 7.

X++ exceptions

When you want to throw an exception in X++, you typically do it by something like this:

throw error("It's broken!");

It’s a functional equivalent of adding a message to infolog and throwing Exception::Error.

infolog.add(Exception::Error, "It's broken");
throw Exception::Error; // number 3

As you see, an exception in X++ is (or used to be, as I’ll discuss later) just a number, because enums are backed by integer values. It doesn’t come with any extra information, not even the message. Adding messages to infolog is a separate process; you can add error messages to infolog without throwing any exceptions and throwing exceptions without adding anything to infolog.

When you want to catch an exception, you’ll use a catch clause with the right value of Exception enum (usually Exception::Error) or you’ll handle all exceptions (by a catch clause without any type).

The following statement will work for all errors, but you don’t get any information about what error it was:

catch (Exception::Error) {}

Just knowing that there is an error doesn’t allow you to react differently to different errors, therefore you’ll rarely see code in AX trying to recover from a particular error.

CLR exceptions (in general)

It’s very different in Common Language Runtime (CLR). Exceptions there are objects (instances of classes extending System.Exception) and they contain a lot of information that can help you to identify what happened. For example, you can look at the type of exception (e.g. ArgumentNullException or FileNotFoundException) and react accordingly. The error message is a part of the object too, not just lying somewhere in infolog. The exception also comes with the stack trace, so you can easily see where it was thrown from.

Because the classes form a hierarchy, you can also handle exceptions in a hierarchic way. This is what you can write in C#:

catch (FileNotFoundException ex) {}
catch (Exception ex) {}

The system will try catch clauses one by one, going from the top down, and will use the first compatible clause it finds. If a FileNotFoundException is thrown, the first block will be used, but all other exceptions will go to the latter one, because they’re not FileNotFoundException but they’re all compatible with System.Exception, which its their common base class.

Exception::CLRError

Sometimes you have to handle CLR exception in X++, because you can use .NET libraries from X++ and such libraries can throw their usual (CLR) exceptions. The traditional approach is catching Exception::CLRError, getting the exception object from CLRInterop::getLastException() and extracting information from it. It’s further complicated by the fact that the actual error is usually wrapped in TargetInvocationException.

This is how you can handle FileNotFoundException in X++:

try
{
    System.IO.File::ReadAllText('c:\\nothing.here');
}
catch (Exception::CLRError)
{
    System.Exception wrapperEx = CLRInterop::getLastException() as System.Reflection.TargetInvocationException;
    if (wrapperEx)
    {
        if (wrapperEx.InnerException is System.IO.FileNotFoundException)
        {
            warning(wrapperEx.InnerException.Message);
        }      
    }
}

It works, but it’s cumbersome and hard to understand.

Catch with object reference

Fortunately AX 7 offers a new, much better option. Let me start by refactoring the previous example:

System.IO.FileNotFoundException fileNotFoundEx;
 
try
{
    System.IO.File::ReadAllText('c:\\nothing.here');
}
catch (fileNotFoundEx)
{            
    warning(fileNotFoundEx.Message);
}

This is obviously much shorter and easier to follow. In catch, I don’t have to use only values of the Exception enum anymore, I can also use exception objects. The system checks the type, selects the right catch clause and passes the exception object there. It’s almost the same as in C#, except of the fact that you can’t define the exception type directly in the catch condition; you have to declare a variable in an outer scope.

As in C#, you may have several catch clauses for different types of exceptions and benefit from the hierarchical nature of exception types. For example, the following snippet handles two types of exceptions in a special way and all remaining exceptions go to the last catch clause.

System.Exception                generalEx;
System.FieldAccessException     accessEx;
System.IO.FileNotFoundException fileNotFoundEx;
 
try
{}
catch (accessEx)
{
    warning("Field access");
}
catch (fileNotFoundEx)
{
    warning("File not found");
}
catch (generalEx)
{	
    warning(ex.Message);
}

ErrorException

All right, so X++ errors can be caught with catch (Exception::Error) and CLR exceptions by their particular type, but isn’t all code now executed by CLR? Does it mean that X++ exceptions use a different mechanism than CLR exceptions, or they’re just normal CLR exceptions under the hood?

You can find the answer in debugger, which reveals that “native” AX exceptions are indeed implemented as CLR exceptions:

The object (as you can see in debugger) has all usual properties, such as Message, Source, StackTrace and so on. Note that you can see the same behavior in AX 2012 if you debug CIL generated from X++.

Now what if you want to access the properties when handling an exception, e.g. to include the stack trace in a log? If you catch Exception::Error, you won’t get any details, but what if you try to catch ErrorException in the same way as any other CLR exception? If you think it should be possible, you’re right – the following piece of code successfully catches an X++ exception and shows how you can access its properties.

Microsoft.Dynamics.Ax.Xpp.ErrorException xppEx;
 
try
{
    throw error("It's broken!");
}
catch (xppEx)
{
    this.log(xppEx.StackTrace);
}

The problem that all X++ errors have the same exception type (ErrorException) is still there, therefore handling different errors in different ways is still hard, but you can now easily find which message belongs to the exception (without digging into infolog), where it was thrown from and so on.

By the way, I also wondered what would happen if I tried to catch both Exception::Error and ErrorException, because they’re internally the same thing.

Microsoft.Dynamics.Ax.Xpp.ErrorException xppEx;
 
try  
{
    throw Exception::Error;
} 
catch (Exception::Error)
{
    info("Exception::Error");
}
catch (xppEx)
{
    info("ErrorException");
}

Such code compiles without any problem and the resulting CIL will actually contains two catch clauses for the same exception type (ErrorException). It means that the top one always wins, regardless whether it’s catch (Exception::Error) or catch (xppEx). Using both for the same try statement makes little sense, but at least we now know that nothing catastrophic happens if somebody does it by mistake.

Conclusion

The native implementation of exceptions in X++ is very limited in comparison to CLR exceptions. The inability to distinguish between different kinds of errors makes meaningful recovery from errors virtually impossible and the lack of associated information (such as the message) makes even mere logging quite cumbersome. This doesn’t apply to CLR exceptions and their handling in X++ is even easier than before, thanks to the new ability of catch clauses. The fact that we can use this approach for X++ exception as well means that we can easily work around one of the limitations and access properties such as message and stack trace even for them.

It seems that we’re just a small step from being able to work with exceptions in X++ in the same way as in .NET. If we could throw exception objects (e.g. throw new MissingRecordException()), we would be able catch this particular type of exception and implement more robust logic for recovery from errors.

It would also help if X++ was extended to support declaration of the exception type directly in catch (e.g. catch (MissingRecordException ex)).

On-premises deployment landing page

$
0
0

The on-premises deployment option for AX 7 (Dynamics 365 for Finance and Operations, Enterprise Edition) was longed for by many and it’s finally there. You can learn more about it on On-premises deployment landing page.

Integration with AX 7 in cloud

$
0
0

I’m getting a lot of questions along the lines of “how on earth can we integrate our on-premises systems with AX 7 running in cloud?”, therefore let me share some of my thoughts.

The first important point to realize is that “to integrate” means many different things, so there is no single solution for it. On the contrary – you know have more options than before, because you can easily utilize many existing cloud services, which weren’t that useful when your ERP wasn’t running in cloud. Although I mention quite a few options below, the list isn’t comprehensive by any means.

You have to take many things into account when designing your solution: which system triggers the integration (AX, external systems), what’s the trigger (schedule, user activity…), whether you need a response in synchronous manner or you can utilize queues (which is better for load balancing), what are requirements for performance, reliability, monitoring and so on and so on. I’m not going to discuss these things in detail, but you mustn’t forget about them.

Below I look at some integration options based on which system is triggering integration. There are quite a few links, if you want to learn more.

From your servers / workstations

The most straightforward approach is sending requests from your own machines to AX.

It may be a from a desktop application (the Excel add-in calling OData services exposed by AX 7 is a good example) or a server process (e.g. a service monitoring a network folder and pushing files to AX).

If you want to call AX directly, you can use its services (especially OData and custom services), including pushing files through web services (e.g. data management API), but it’s often not the best strategy. For example, you may want to send messages even if AX is down for maintenance and therefore you merely put them to some storage (Service Bus queue, blob storage, file storage…) where AX will find them when it’s back online.

Or maybe you have some additional logic to run, such as a workflow with conditions, message transformations, aggregation with other data and so on. You can utilize things like Logic Apps or Azure Functions for this purpose. Alternatively, you can run your logic on-premises before sending messages to cloud; then you can use BizTalk, for instance.

Logic Apps can also read data from storage and pushing it to AX, so you don’t have to implement it by yourself.

From AX

Running a piece of code in AX (usually in a batch) is a natural choice for many AX developers, but some aspects are a bit different in cloud.

In past, people often put files to import (to take this direction as an example) to a network folder, where AX read them on schedule. Now they ask how to put files to production VMs, which simply isn’t possible. You also can’t expect Azure applications to read files directly from your local hard disk. If you want to use this approach, you must store your files elsewhere, such as in an Azure storage in your subscription, on FTP and so on. For example, you can put files to OneDrive or a file storage mapped as a drive and let AX to read them from there via an API (although you may want to leave it to a Logic App, as demonstrated in File based integration using Logic Apps).

You can also call web services from X++, which includes even web services offered by your on-premises systems (exposed by Azure Relay, for example).

You can also call middle-tier services and execute any other code you like.

From a middle-tier service

There is a third option, when integration is orchestrated by another service in the middle. For example, you may have a logic app that runs on schedule, reads data from your on-premises Oracle database and uses the connector for AX 7 to create records in AX. Then you don’t have to develop any on-premises application pushing data to cloud, you merely install a gateway).

Some people are afraid that there is no way how to integrate on-premises and cloud systems, but that’s obviously not the case. You have many options, you just must choose the right one for your particular goal. It’s different than if everything runs in your own server room and it’s likely confusing if you’re not familiar with Azure (with new types of storage, app authorization and so on), but that’s what always happen when you start working with different architecture. You’ll also often combine several services, rather than having a single universal solution for integration.

Open API for JSON-based custom services in AX 7

$
0
0

If you’re familiar with SOAP web services, you likely know that they use Web Services Description Language (WSDL) to document what operations a service provide, what parameters they accept, what they return and so on. This information can be used to generate proxy classes, which you can use to communicate with remote systems simply by calling class methods and all implementation details are handled for you under the hood.

While SOAP-based services offer many configuration options (e.g. you can switch from TCP to HTTP just by changing a config) and great tooling, sometimes it’s beneficial to use a less sophisticated approach and expose and call services directly over HTTP (that’s why AX 7 added JSON-based endpoints for custom services). Almost everything can communicate over HTTP, it doesn’t require any extra libraries, it’s very flexible and so on. There are some patterns how to design such services (especially REST), but you can do whatever you want. But it means that you have to give up features like code generation of proxy classes. Or not?

While HTTP web services don’t have to use any descriptions similar to WSDL, it doesn’t mean they can’t. One of your options is Open API (also known as Swagger), which allows you to describe services in JSON or YAML. There are many tools for working with these descriptions, such as an editor, code generators for many languages, a generator of documentation, you can generate Open API descriptions for your WebAPI projects, there is a support for Open API in Azure Logic Apps, in Azure API Management and so on.

Let me show you an example of such a description for a custom service in AX 7 (Dynamics 365 for Finance and Operations, Enterprise Edition). You don’t have to examine it in detail, just notice that it describes available operations, what URL you must use to reach it, what parameters it expects, what it returns and so on, and it also contains additional textual annotations.

{
  "swagger": "2.0",
  "info": {
    "title": "User management",
    "description": "Services for user management offered by Microsoft Dynamics 365 for Finance and Operations, Enterprise Edition.",
    "version": "1.0.0"
  },
  "host": "YourAX7Instance.cloudax.dynamics.com",
  "basePath": "/api/services",
  "schemes": [
    "https"
  ],
  "paths": {
    "/SysSecurityServices/SysUserManagement/getRolesForUser": {
      "post": {
        "summary": "Gets security roles",
        "description": "Returns security roles currently assigned to the given user in Microsoft Dynamics 365 for Finance and Operations, Enterprise Edition.",
        "operationId": "getRolesForUser",
        "produces": [
          "application/json"
        ],
        "parameters": [
          {
            "name": "body",
            "in": "body",
            "description": "User ID as defined in UserInfo table.",
            "required": true,
            "schema": {
              "$ref": "#/definitions/GetRolesRequest"
            }
          }
        ],
        "responses": {
          "200": {
            "description": "Roles assigned to user",
            "schema": {
              "type": "array",
              "items": {
                "type": "string"
              },
              "example": [
                "-SYSADMIN-",
                "SYSTEMUSER"
              ]
            }
          },
          "500": {
            "description": "Processing inside Dynamics 365 for Finance and Operations failed."
          }
        }
      }
    }
  },
  "definitions": {
    "GetRolesRequest": {
      "type": "object",
      "required": [
        "axUserId"
      ],
      "properties": {
        "axUserId": {
          "type": "string",
          "example": "admin"
        }
      }
    }
  }
}

The first thing we can do with it is to show the same information in a more readable way. Open the online editor and paste the sample code there. On the right side, you’ll see it rendered as a nice HTML document:

Service documentation generated by editor.swagger.io

The editor can also use YAML (and will offer you to convert JSON to YAML), which is a more succinct format, therefore you may prefer it for manually edits. I intentionally used JSON, because we’ll need it in the next step.

Code generation

Now let’s generate code for calling the service, so we don’t have to do it all by hand and deal with all implementation details of communication over HTTP, with (de)serialization of values and so on.

Before you start, download and configure AX service samples from GitHub and verify that they work. Then create a new console application in ServiceSamples solution, where we’ll call a custom service through generated client classes. My code below assumes that the project is called JsonConsoleWithSwagger; you’ll have to adjust a few things if you use a different name.

Client classes can be generated by several different tools, therefore the following process is just an example; feel free to use other options in your projects.

Download and install NSwagStudio (if you use Chocolatey, as I do, all you need is cinst nswagstudio). Run NSwagStudio, paste the JSON on Swagger Specification tab, tick CSharp Client and change a few properties at CSharp Client tab:

  • Namespace: JsonConsoleWithSwagger (or something else, if you named the project in Visual Studio differently)
  • Class Name: UserManagementClient
  • Use and expose the base URL: No
  • Class style: Poco

You could use different parameters, such as different Class style, but this will suffice in our case.

Then press Generate Outputs, which will generate corresponding C# code. Copy it to clipboard, create a new class in your Visual Studio project and replace the file content with the generated code.

We need to add just two things – the actual URL of your AX instance and an authentication header. We don’t want to change the generated code itself, because we may need to regenerate it later and we would lose our changes. Fortunately, it’s not needed – the class is partial, therefore we can create another part of the same class in a separate file and keep generated code and custom code cleanly separated.

Create a new file in your project and paste the following code there:

using AuthenticationUtility;
using System.Text;
using System.Net.Http;
 
namespace JsonConsoleWithSwagger
{
    public partial class UserManagementClient
    {
        partial void PrepareRequest(HttpClient client, HttpRequestMessage request, StringBuilder urlBuilder)
        {
            PrependAxInstanceUrl(urlBuilder);
            client.DefaultRequestHeaders.Add(OAuthHelper.OAuthHeader, OAuthHelper.GetAuthenticationHeader());
        }
 
        private void PrependAxInstanceUrl(StringBuilder urlBuilder)
        {
            string service = urlBuilder.ToString();
            urlBuilder.Clear();
            urlBuilder.Append(ClientConfiguration.Default.UriString);
            urlBuilder.Append("api/services/");
            urlBuilder.Append(service);
        }
    }
}

PrependAxInstanceUrl() takes the address of your AX from configuration and puts it at the beginning of the request URL.

Then the code sets the authentication header with the help of OAuthHelper from AuthenticationUtility project, therefore we must add a reference to it:

The last step is adding code to Main() method of Program class to actually call the service. We create a request object (please provide an existing user ID there), create an instance of the UserManagementClient class generated from our Open API document and call the operation. It’s asynchronous, as recommended, but we don’t really need that here, therefore the code immediately asks for the result and waits for it. Then we iterate roles received from AX and puts them into console.

GetRolesRequest request = new GetRolesRequest()
{
    AxUserId = "user7281"
};
 
var roles = new UserManagementClient().GetRolesForUserAsync(request).Result;
 
foreach (string role in roles)
{
    Console.WriteLine(role);
}

That was easy – we didn’t have to bother about what exact parameters the services expects (and we would get a compile error if we did it wrong), we didn’t have to serialize objects to JSON or anything like that. The generator was able to create all the code for us, it just needed to know how the service looks like.

In this case, I wrote the Open API document by hand, which obviously took some time. A much better approach would be generating it from metadata of custom services in AX, and while I don’t have such a solution in the moment, it’s definitely doable. Some information is already in place (e.g. getting the list of operation is easy), services and service groups already have properties for description (although they’re currently empty in most cases) and things like parameter description can be included in XML documentation. It still doesn’t cover everything, but additional information can be easily provided in attributes. It’s exactly what Swashbuckle does, e.g. with SwaggerResponseAttribute and RequiredAttribute.

I think it’s something that Microsoft should use for its custom services, to provide documentation and to make custom services much easier to consume. Open API / Swagger is a natural choice for this purpose, because Microsoft is a founding member of Open API Initiative and already support it in several products. Maybe Microsoft could somehow utilize Swashbuckle inside the implementation of custom services, instead of building something new from scratch.

But even if Microsoft isn’t interested, I believe it would still be useful for many people, therefore the community could build a tool to extract information about custom services and generate Open API documents. It wouldn’t necessarily have to support all features (or not from the beginning); people can easily add textual annotations, examples and so on in Swagger Editor, if needed. But being able to automatically generate JSON-based client classes for any custom service would be really handy.

Recurring Integrations Scheduler

$
0
0

You may have heard about QuartzAX, an application for file-based integration with AX 7 (Dynamics 365 for Finance and Operations, Enterprise Edition). Microsoft announced at the last Technical conference that it would be released in a few days, but it didn’t happen and it looked like it wouldn’t ever be made available. But it has changed today.

You can find its source code and documentation on GitHub under the new name: Recurring Integrations Scheduler.

Reference group and GROUP BY

$
0
0

This blog post explains a problem that you can run into when using reference group controls with grouped data – and a solution for this problem.

I have a table which stores references to workers. The field has HcmWorkerRecId data type, i.e. it stores record IDs from HcmWorker table. When I drop this field to a grid on a form, the system uses Reference Group control, which shows human-readable data instead of RecId numbers. By default, it shows worker names.

There are multiple records for the same worker, therefore if I want to show data summarized data for each worker, I add grouping to the query:

TableWithRef_ds.queryBuildDataSource().addGroupByField(fieldNum(TableWithRef, Worker));

But the result isn’t correct – the reference group doesn’t show anything.

The grouping works correctly; I can see the right record IDs if I display them thought an Int64 control instead of a reference group.

The problem is that we group only by the record ID, but not by Name. And because Name is neither used in GROUP BY nor it has an aggregation function applied, its value is undefined and there is nothing to show.

Let’s fix it. Go to the data source in AOT and add reference data sources. Because Name field isn’t directly in HcmWorker table, we’ll need one more data source – DirPerson. Like this:

You can add them by right-clicking the Reference Data Sources node, choosing New Reference Data Source and then setting properties Join Relation and Name.

Then we can easily add an extra field to group by, this time from DirPerson table:

DirPerson_ds.queryBuildDataSource().addGroupByField(fieldNum(DirPerson, Name));

Voilà, names are back!


Splitting .xpo files

$
0
0

I got an .xpo file from an older version of AX with some code of interest and because it had a few thousand lines, it wasn’t exactly easy to navigate. At least splitting it by object would make my life much easier.

Fortunately I looked at the internet and found exactly the right tool for this task: xpoTools.

It’s not well-documented, but what I needed didn’t require much anyway. After installation, I simply ran the following (Powershell) code:

cd c:\Temp\XPO\
ls *.xpo | Import-Xpo | Split-Xpo -Xpp

Import-Xpo parses xpo files to objects expected by Split-Xpo, which creates a file for every object. The -Xpp flag means that the result are not .xpo files, but rather more readable files with pure source code (without all those # characters and things like that).

This might be the last time I used this tool, but it did help me today. As often, a single search on internet saved me a lot of time.

Thank you, mazzy.

Thoughts on element prefix vs. suffix

$
0
0

When I read Evaldas Landauskas’s blog post Development guidelines: Prefix Vs. Suffix, I thought I would write a comment below the post and share a few ideas, but then I decided that it’d be better to write my own blog post. Here I have a much better control over formatting and the content will be more visible than if it’s hidden in a mere comment.

I’m not going to dispute the argument that prefixes are better; I’ve seen teams using various approaches and I’m fine with most of them. On my current projects, we also use prefixes for most things. But I want to add a few more things to consider.

The statement that you can’t search objects by suffix because you can’t handle those ending with _Extension is underestimation of regular expressions. For example, if I want to find elements ending with either Xyz or Xyz_Extension, I can use Xyz(_Extension)?$. Is it complicated? Yes, a bit. Is it impossible? Definitely not.

Nevertheless are we doing the right thing in the first place? Isn’t our goal to find elements in our model? If so, searching by a part of name doesn’t really match our intention. We should model:”XYZ project” instead.

Finding all elements starting with a company prefix is nice, but it’s not what people usually need. A more common task is finding extensions of an existing element, such as a table. I think this should be really easy, because it’s both common and important, but we lack really good tools for that. As a workaround, some people choose starting names of extension classes with the name of the original object, which allows them to see all extensions together. We can use regular expressions again to deal with prefixes as well, such as searching for something like type:class SalesTable.*_Extension$, but any solution based on name simply isn’t good enough, in my opinion. And references aren’t great for this purpose either. But we have to live with what we have, or to build better tools.

Changing the topic, I’m also not sure where this statement came from: “We should follow Microsoft’s pattern and suffix it as well.”. As far as I know, Microsoft doesn’t address vendor prefixes/suffixes at all and general naming conventions say that “A subject area specific application object is prefixed with the name of the subject area the object belongs to, for example Cust*, Invent*, Ledger*, Proj*, Vend*”. Therefore names like RevRecAmountPercentList look correct to me.

We surely can find many places where Microsoft isn’t following best practices, just note that SalesFormLetter extending FormLetterServiceController is a special case. It used to extend FormLetter class, but it has changed when SysOperation framework was introduced. One could argue that the name should have been FormLetter_Sales instead of SalesFormLetter, but naming conventions say that it can be the case and not that it must.

I would like to thank Evaldas for giving me something to think and write about. 🙂

Viewing all 117 articles
Browse latest View live